

How To Repair An Overexposed Photo In Adobe Photoshop
Hey there PaintShop Pro users, my name is Bob or, as bunch of you from the Facebook community know me—Tattoo Bob. I'm a large fan of PaintShop Pro, often using it to draw and create my own original artwork, edit photos and create fun compositions.
Here on Points of View, I'll be bringing yous all sorts of tutorials to help you get to know PaintShop Pro a trivial amend.
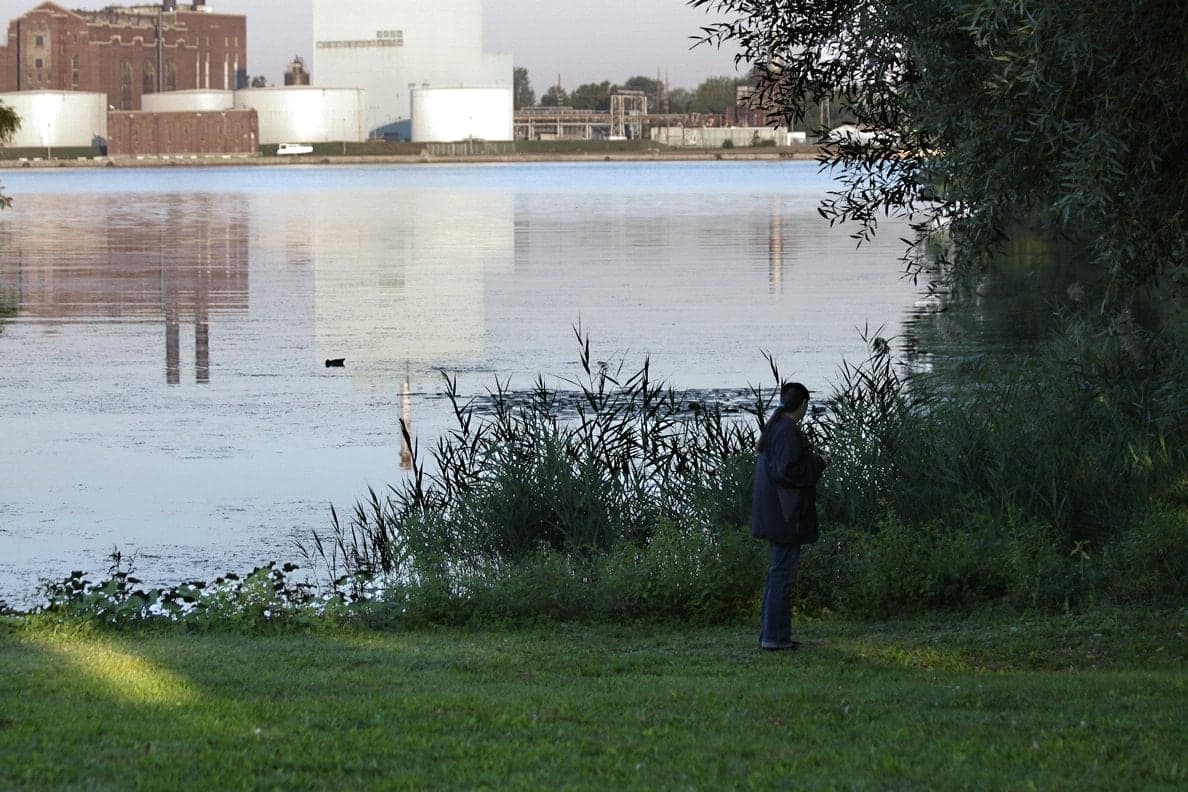
In my first lesson, we'll look at how to gear up a photo that's overexposed in 1 office, but non in another. If yous take a await at this photo I took, you'll see the groundwork is overexposed and appears too bright. This often happens when you take pictures outside and your camera lets in a little too much light, leaving you with vivid spots and dark spots. To fix this overexposed photo, nosotros'll play with the RGB channels and Layer Masks. If you oasis't already installed PaintShop Pro X8, download the gratuitous 30-day trial and follow along by downloading the sample paradigm, just in instance y'all don't have an overexposed photo on paw that needs fixing.

Pace 1 – Open Your Image
The beginning step is to open up up the overexposed photograph you desire to set up. If you're already in PaintShop Pro, merely become to the File carte in the acme left of your screen, select Open, and navigate to find the photograph you're looking for. You should now be looking at something similar to the screenshot above. Notice that the background of the image is blown out.
Step 2 – Duplicate the Groundwork Layer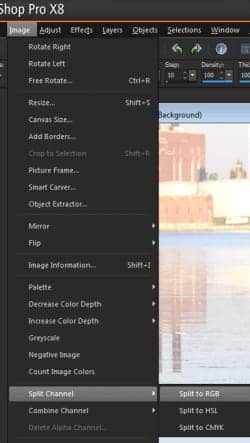
Once yous've got your epitome open, right-click the Background layer in the Layers palette and click Indistinguishable. This puts a re-create of your photo on a second layer so you lot can always maintain your original. Whatsoever changes yous make will be applied to the 2nd layer you just created (for more on layers, cheque out this post, an Introduction to Working with Layers in PaintShop Pro).
Footstep 3 – Divide RGB Channels and Copy
At present that you have a second layer to piece of work on, click onImage in the menu bar at the peak of the screen, select Dissever Channel, then click Split to RGB. This will show yous how the image appears in the Reddish, Dark-green, and Blue channels.
You should now run into three (three) black and white images on your screen. From those images, find the ane that looks darkest in the overexposed area of the original and click on it to make information technology the active file, bringing it to the meridian.

Step 4 – Paste Every bit New Layer & Prepare Blend Mode
With the darkest aqueduct selected, go up to theEdit menu and click Copy. You can get ahead and close all three black and white photos now. Side by side, become dorsum to the Edit menu and select Paste As New Layer . The black and white image should now appear equally the top layer in the Layers palette . Still in the Layers palette, set the Blend Way to Multiply (every bit seen in the screenshot below, by default it is set to Normal).
Step 5 – Paint In Your Layer Mask
The next step is to create your Layer Mask to get rid of the dark tint we added to the properly exposed areas.
At the bottom of the Layers palette, click the New Layer Mask push button and then select Evidence All .
Your next step is to click on the Pigment Castor tool. With your foreground colour set to black and the brush hardness gear up to around 25, start painting over the parts that were non overexposed. Exist sure to change upwardly your castor size so you can really go into some of the more detailed areas.
This is what my image looked like before I tackled the edges and detail work.
What else can you lot do?
If you observe the overexposed areas of the photo are nonetheless blown out, you tin can continue to fix them past duplicating your mask layer to darken things up some more. You can make corrections to both mask layers equally y'all meet fit. And, if you want to go a amend blend with the original, try irresolute the Opacity of the Layer Mask to allow the original to show through.
Once you're satisfied your photo no longer looks overexposed, similar to how mine looks below, you can keep to heighten the image only equally you lot unremarkably would.
Not certain what else you can do with your photos after correcting the overexposure? Then be sure to tune in for my next tutorial here on weblog. And, in the concurrently, yous tin visit the Corel Discovery Middle too for even more tips and tricks!

Source: https://learn.corel.com/fix-overexposed-photo-tutorial/
Posted by: grishamesturne.blogspot.com
0 Response to "How To Repair An Overexposed Photo In Adobe Photoshop"
Post a Comment